How To Adjust Roof Overhang In Revit

Roof Overhang Problem Autodesk Community Revit Products

Revitcity Com Roof Overhang Extension
Revit 2014 Roof Eaves And External Wall Youtube

Solved Roof Level Overhang Autodesk Community Revit Products

Solved Roof Overhang Option Not Available For Some Roofs Autodesk Community Revit Products

Revit Roof Tip 5 Activate Overhang On Picked Walls Roof Youtube

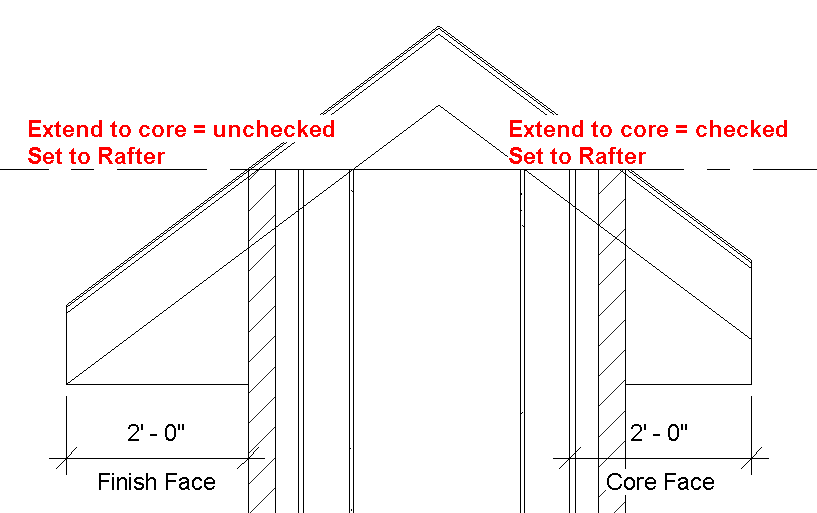
Extend into wall to core.
How to adjust roof overhang in revit. Then select the line style you want to represent the roof overhang in the view. You ll notice i m selecting these and pushing them back so we get the same amount of one foot drop. This post explores the effect of different types of wall finish materials on the overhang of the roof. Use pick walls if you want the roof to automatically adjust when walls are moved.
Change the roof overhang. This four minute friday will show how to adjust roof eave edges. You can set an overhang on roofs created with pick walls. 6 add vertical or by face openings.
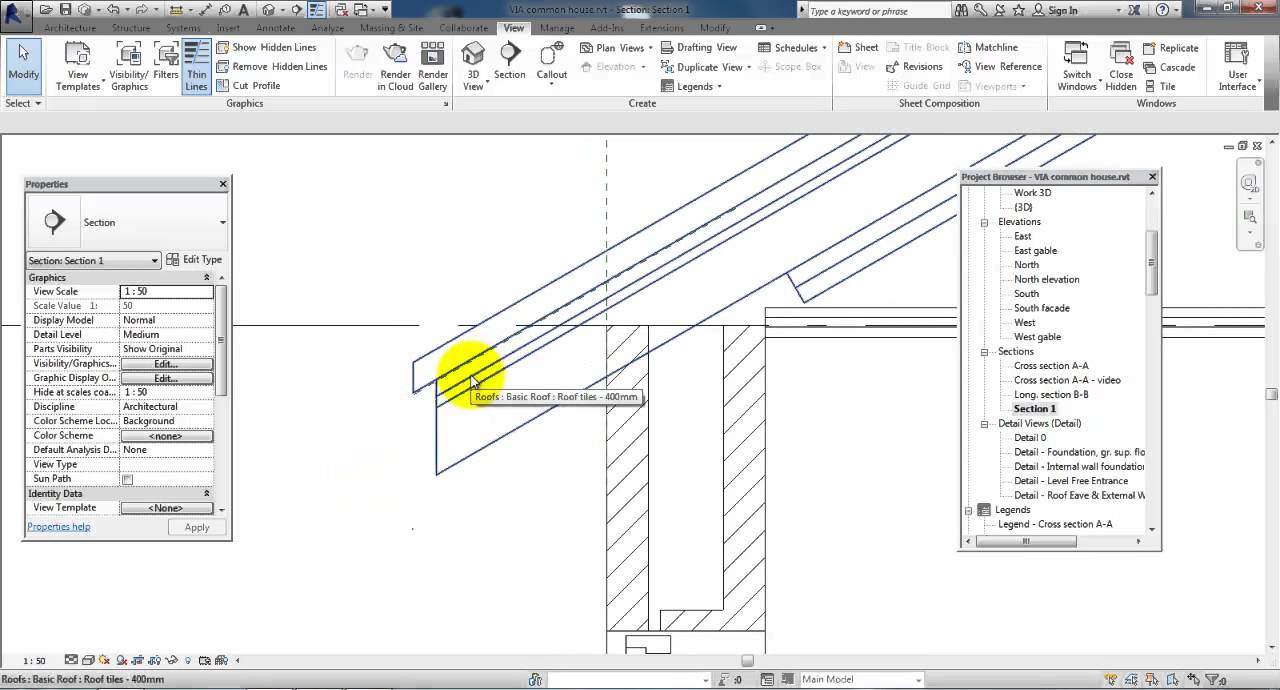
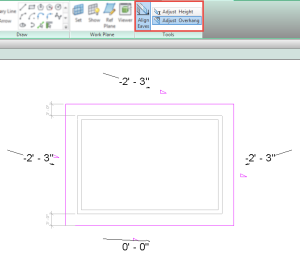
If i accept that it. Modify a roof edit the roof sketch. Now the next step is to select the linework tool from the modify tab view panel. Select each boundary line and set the value in properties or in option bar.
Use this method to resize roofs that were created by footprint or by face. When you create a roof in revit using the select walls tool in the options bar you will see an option with a checkbox see the left red colored arrow in the image below. Resize the roof using shape handles. Two options for the overhang.
Double click the roof or select the roof and click modify roofs tab mode panel edit footprint. In the properties dialog box for the view you want to see the overhang lines in set the underlay drop down to be the level on which the roof was created.

Revit Roof Edits Increasing The Overhang Youtube
Overhangs And Wall Thicknesses In Revit Best Cad Tips

Modify A Roof Revit Lt 2017 Autodesk Knowledge Network

Trim Interscting Roofs Autodesk Community Revit Products

Revit Adjusting The Top Chord Of A Truss For An Overhang Youtube

Eaves Revit Products 2019 Autodesk Knowledge Network
How To Attach A Howe Truss With Overhang To A Roof In Revit Revit Products 2018 Autodesk Knowledge Network

How To Troubleshoot Roof Overhang And Offset Issues In Autodesk Revit Youtube

Creating An Overhang Youtube

How To Adjust Roof Eave Edges Youtube

Prefab Roof Truss Overhang Issue Autodesk Community Revit Products
Https Portal Imaginit Com Portals 0 Whitepapers Imaginit New Wp Revitroofs Pdf

Revit Roofs 8020 Bim

Revit Roof Edits Increasing The Overhang Revit Architecture Autodesk Revit Roof

Roof Overhang Autodesk Community Revit Products

Revit Lesson 6 Jeanomar Scully 214 095 933 Src221

Solved Why Can T I Make This Roof Autodesk Community Revit Products

Solved Joining Roof Autodesk Community Revit Products

Solved Roof Overhang Overlap Single Sketch Autodesk Community

Create Roof Trusses With Purlins In Revit Roof Trusses Roof Truss Design Roof
How To Show A Roof Overhang In A Plan View With Revit Imaginit Building Solutions Blog
Video Create A Roof Revit Products 2020 Autodesk Knowledge Network
Roof Overhang Values Bd Mackey Consulting The Revit Geek Blog

Create A Roof By Footprint Revit Products 2016 Autodesk Knowledge Network

Https Encrypted Tbn0 Gstatic Com Images Q Tbn 3aand9gcr9mdyox86unm Ekfatqenr Dn1hpujukervg Usqp Cau

Revit Architecture Roof By Footprint Bimscape

Revit Roof Tutorial Revit Curved Roof Youtube

Revit 2018 Soffit And Fascia Tutorial Youtube
Align Eaves Bd Mackey Consulting The Revit Geek Blog

9 Tips To Understand Revit Roofs Revit Pure

Roof Cut To Match Fascia Material Autodesk Community Revit Products

9 Tips To Understand Revit Roofs Youtube

3 Benefits Of Using Revit View Filters Cadnotes Filters Doors And Floors Views

Dormers In Revit Roof Computing And Information Technology

Eave Returns Interpreting Gyhr Details Thisiscarpentry Gable Roof Design Roof Detail Colonial House Exteriors

Part 5 Create A Roof Revit Lt 2020 Autodesk Knowledge Network

Creating A 2d Line Based Detail Component Family Revit Products Autodesk Knowledge Network
Video Create A Dormer Revit Lt 2019 Autodesk Knowledge Network

Wood Framing Metal Framing In Revit The Most Significant Enhancements Of The Year Feb 2019 Feb 2020 Agacad

How To Show A Roof Overhang In A Plan View With Revit Roof Overhang How To Plan Roof

Roofs Revit Products 2019 Autodesk Knowledge Network
Wall By Face Part 2 Creating A Slanted Wall Tool Wall Create Face

Soffits Revit Products 2019 Autodesk Knowledge Network

