How To Add Roof Flashing

Pin On Roof

Pin On Back Porch

How To Roof A House Diy Roofing Roofing Home Construction

How To Flash Corrugated Barn Roofing Google Search Roof Installation Metal Roof Installation Corrugated Roofing

Pin On Construction

Pin On Gutter Flashing

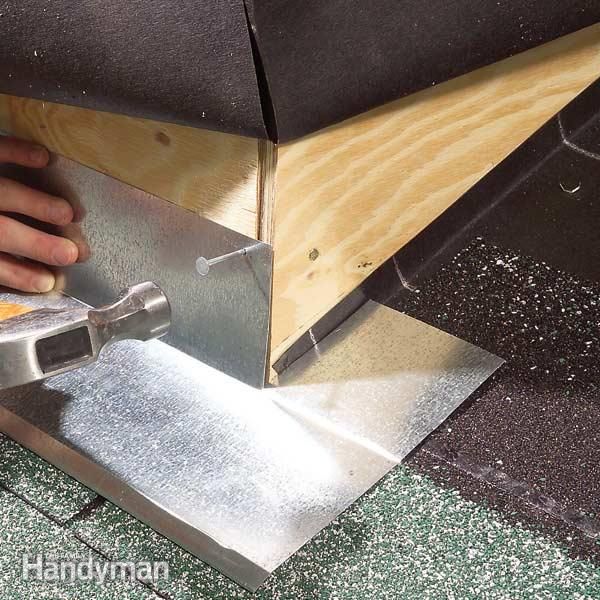
Install the step flashing before running the first row of shingles install a piece of step flashing along the sidewall so that it sits tightly against the roof.
How to add roof flashing. Align the step flashing with the leading edge of the starter course and nail it in place using one nail in the upper corner. After this incise the first flashing to bend properly so that it can go round the front of the chimney its side as well as the base. Once the shingles are installed lay the flashing about 4 inches past each end of the chimney. Cut some membrane material to seal between the vent flashing and the roof and cut an opening for the vent.
Use roofing nails to install the l shaped flashing flush with the roof and wall then cover it with roofing cement and reattach the roofer s felt. Continuous flashing against a sidewall is one way to install a roof but it s not the correct way. Bend it back so that it overlaps the corner flashing. Gaf mastering the roof chapter 13 flashing is used to seal and protects joints in a building from water penetration by direct the flow of water away from.
Once you perform the step above use plastic roof cement under the base part of the flashing. Apply a thin bead of silicone around the opening of the vent pipe area and lay the membrane in place. The metal flashing must overlap the material not the other way around. It may seem as if a single piece of flashing would offer more protection than many pieces of step flashing.
Then set the piece down. How to install step flashing with a wall corner step three. Begin by removing the shingles at the affected area and removing old flashing if present. Nail it in place with two nails one.
Once even a small section of roofing cement fails you ll have a leak. Hammer one nail to the. Next place your vent flashing on top of the membrane.

Making A Skylight Leakproof Skylight Roof Repair Green Roof

Pin On Karkasnik

Pin On Diy And Crafts

Pin On Roofs Roofing

Pin On Exterior Projects

Pin On Roof

Pin On Roof

Pin On Home Improvement

Pin On Cheap Roofing Maintenance

Pin On Roof

Pin On Building Science

Pin On Home Projects

Pin On Roof

Cricket And Stepflashing Masonry Chimney On Shingle Roof Stroitelstvo Doma Dom Proekty Nebolshih Domov

Pin On Cool

Pin On Projects Garage

Pin On Patio Roof

Pin Em Roofing
Https Encrypted Tbn0 Gstatic Com Images Q Tbn 3aand9gcqfwuteol9cqcfhrvz4ubixixg8klwbqrunasts9ammzo2vd5m6 Usqp Cau

Pin On Are Test Prep

Pin On Maintenance

Building A Roof Saddle For A Chimney To Stop Roof Leaks Building Roof Home Construction Roof

Attaching A Ledger To Brick Walls Requires The Best Methods Building A Deck Exterior Brick Brick Wall

Pin On Door Awning

Pin On Breezeway Mudroom Rooftop Deck

Diy Portico Part 2 Finishing The Ceiling The Roof Addicted 2 Decorating Diy Roofing Portico Roof Decoration

Pin On Roofing

Details That Matter On Asphalt Shingle Roofs Roof Installation Roof Shingles Fibreglass Roof

Pin On 9879 Amberley Drive

Pin On Back Patio Fix
Pin On Remodels And Renovating

Pin On Proteccion Contra El Agua

Pin On Roofing Stuff

Pin On Building Tips

Heavy Membranes At Valley And Roof Deck Penetrations Building America Solution Center Roofing Roof Repair Diy Roof Repair

How To Install A Skylight Skylight Installation Diy Skylight Velux Skylights

Pin On Diy

Pin On Uninspiring House Improvements

Pin On Exterior Design

Pin On Skylite

Pin On Contractor Tips
Put Metal Roof Mobile Home Wood Burning Fireplace Inserts Stone Chimney Fireplace Inserts

