How Do You Lower Your Awning On A Rv

How Do I Add A Screen Room To My Rv S Awning Rv Screen Rooms Trailer Awning Rv Screen

How An Rv Awning Works In 2020 Rv Rv Maintenance Camper Awnings

Pin On Stuff

How An Rv Awning Works In 2020 Rv Repair Rv Maintenance Rv Care

Reduce The Dirt From Getting Into Your Rv With Rv Mats These Rv Mats Can Be Easily Placed Under The Awning Of Your Rv Vi Recreational Vehicles Curb Appeal Rv

Finished My Diy Awning Pics Camper Awnings Diy Awning Diy Camper

So reattach the front leg to the side of the rv and raise it up a bit.
How do you lower your awning on a rv. At the least it is a nice luxury to possess for the comfort and coolness it provides. With your drill start by removing the main bolts that hold the top of the awning to the side of the rv. Whether you like it or not your rv awning is going to wear and tear over time and will eventually need to be replaced. Now remove the two small screws that prevent the fabric from sliding in the track.
Angle one corner of the awning downward to allow water runoff or invest in an. There is one at each end of the awning. You should now be at the rear of the awning facing the front. Then add back the two screws so you can travel with the broken awning.
Rotate this leg clockwise as many times as you did the front leg. Also make sure your. Few could argue the importance of an awning on an rv when you re out camping in the sweltering heat. Next unplug the power connector and remove the two 5 32 hex key screws located on the awning tube end closest to the front of the rv.
Lower the rear leg detach it from the rv and prop it up on the ladder like we did for the front leg in the previous steps. Don t rip your awning with the door be sure your awning clears the top of your door. The awning should roll up manually. It might seem like that would allow the.
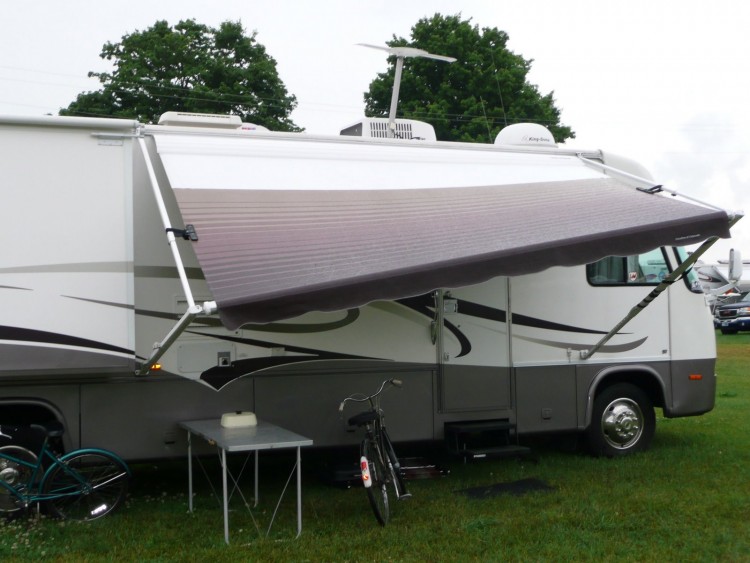
But something you cannot argue against is also that awnings are known to be a bit fragile. The same summer which brings the sweltering heat the awnings protect you against can also bring thunderstorms and. The awning on your rv provides you and the family with shade on those hot summer days a place to park the bikes and even somewhere to set up a table for eating meals outdoors.

Answer To How Do I Add A Screen Room To My Rv S Awning I Would Like To Add A Screen Room To The Awning On My Rv How Do I Choose

Rv Window Tinting Increase Privacy And Reduce Heat Rvblogger Tinted Windows Rv Windows Rv

Rv Awnings Learn How To Set Up Your Awning Youtube

How An Rv Awning Works In 2020 Rv Care Rv Camper Awnings

Replace Your Bag Awning On Your Pop Up Camper Pop Up Tent Trailer Camper Awnings Popup Camper
Rv Awning Repair Read This Before Starting Your Repair Rvshare Com
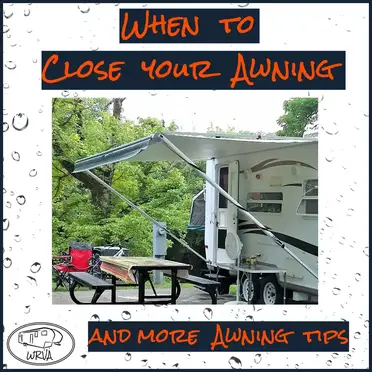
Can You Keep Your Rv Awning Out During Rain And More Awning Tips

Best Rv Awning Cleaner For 2020 Our Reviews Comparisons In 2020 Rv Living Full Time Rv Maintenance Motorhome Living

How An Rv Awning Works In 2020 Traveling By Yourself Rv Maintenance

Rv Protection Portable Carport Rv Carports Trailer Living

Rv Awning Maintenance Isn T Typically At The Forefront Of Your Mind When You Re Thinking About The Health Of Your Rv Learn What Yo Awning Rv Remodeled Campers

30 Best Image Of Rv Camper Canopy Ideas Camper And Travel Penitifashion Rv Carports Carport Carport Canopy

Dave Theoleguy And Nancy S Aliner Awnings Ideas A Frame Camper Trailer Awning Aliner Campers
How To Repair A Torn Camper Awning Camper Report

Camping Tips Camping Camper Camping Lights Camping Glamping

5 Ways To Clean Your Rv Awning Diy Awning Cleaner The Crazy Outdoor Mama

Not Found 404 Camper Awnings Rv Campers Awnings For Sale

Masa Alumiframe Awning At Csl Plasma In Mckeesport Pa Architecture Design Metal Manufacturing Americanmade Awning Canopy Custom Canopy Aluminum Awnings
Https Encrypted Tbn0 Gstatic Com Images Q Tbn 3aand9gctwgaxngqqauwicpqx5jm05eaocss9nmv5r05nqlthoefnjzpev Usqp Cau

Can You Shorten An Rv Awning Here S How To Diy Diy Awning Awning Rv Maintenance

Eezi Awn Manta 270 Degree Awning Left Hand Side Free Shipping To Continental Lower 48 States U S A Introducing The Eezi Tent Awning Awning Caravan Awnings

New Style Sunchaser Awning 15 Ft Camper Awnings Patio Awning Fabric Awning

It S Easy To Replace Your Own Slide Topper Awning Fabric Rv Awning Fabric Fabric Installation Camper Makeover

What Are The Top 5 Youtube Channels That You Should Be Watching Here Is The List Of The Best Rv Channels Where You Can Learn About Rv Camping Rvs And Rv Life
Ebay

Chris S Pop Up Camper Makeover Pop Up Camper Camper Makeover Camper Awnings

Classic Vintage Trailer Pole Rope Vinyl Laminate Awnings In 2020 Vintage Trailer Awning Vintage Trailers

The Importance Of Your Motorhome S Engine Air Filter Motorhome Engine Air Filter Camper Maintenance

Portable Dura Fold Rv Awning With Portable Removable Dura Breeze Screen Room Porch For Rv Rv Screen Rooms Sunrooms And Decks
Rv Awning Tips How To Avoid Damage In High Winds Camper Awnings Camping Trailer Rv Camping Tips

How To Replace Rv Awning Roller Tubes Diy Awning Rv Awning Replacement Rv Maintenance

Add A Room Privacy Panels Add A Room Pop Up Awning

Great Idea To Keep Water From Pooling On The Slide Out Awnings Diy Slides Diy Awning Remodeled Campers

Basic Rv Awning Operation Instructions Rv Basics Com Rv Awning Replacement Camper Awnings Rv

Rv Camping Tips That Will Save You Money In 2020 Rv Camping Tips Camping Hacks Rv Camping

5 Ways To Clean Your Rv Awning Diy Awning Cleaner In 2020 Diy Awning Diy Rv Rv

Carefree Buena Vista Room Fits Traditional Manual And 12 Volt Awnings With Vertical Arms 20 21 Feet Rv Screen Rooms Recreational Vehicles Rv Screen

Click This Image To Show The Full Size Version Camper Hacks Camper Accessories Pop Up Camper

Best Rv Awning Lights For Enjoyment And Relaxation Awning Lights Rv Campervan Interior

Protecting Your Rv Awning Rv Camping Checklist Rv Camping Camper

Rhino Rack Batwing Awning Roof Rack Mount Bolt On Driver S Side 118 Sq Ft Rhino Rack Car Awn Camper Awnings Diy Camper Trailer Car Awnings

Add A Room With Insulated Patio Enclosures Aluminum Roof Add A Room

Arb Mosquito Net Arb4415a North Westy Mosquito Net Add A Room Diy Awning

